Trying Out the Watchmakers Lathe

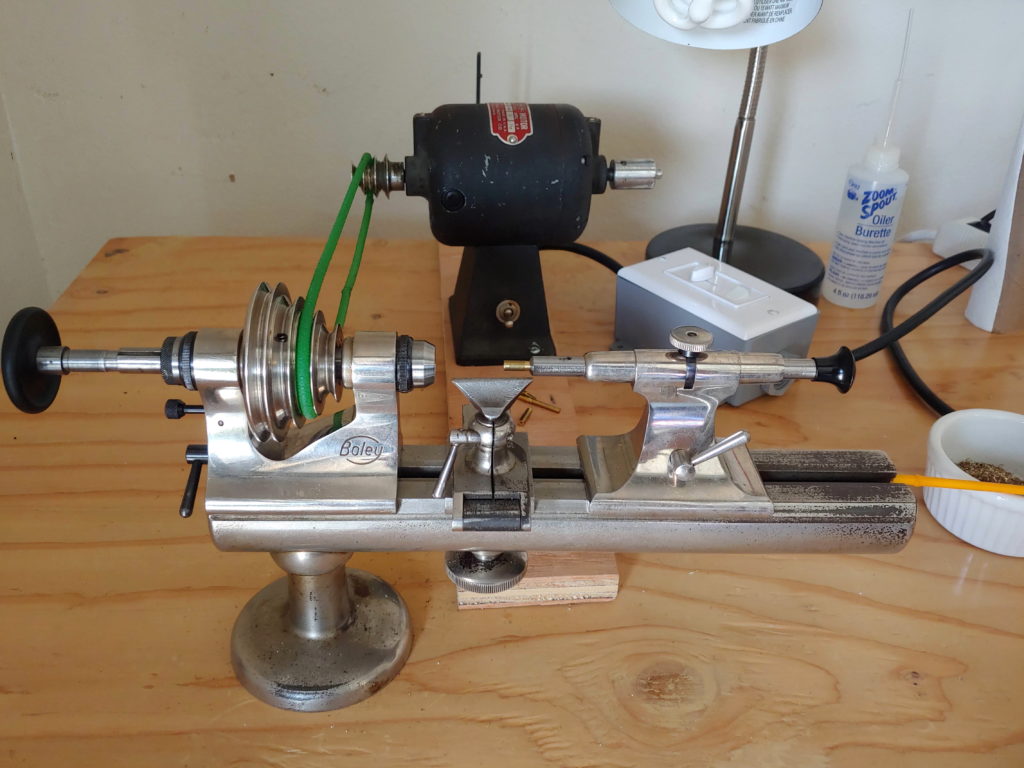
A while back, I purchased a vintage Boley watchmakers lathe to work with, but life got in the way and I wasn’t able to do the work needed to get it running. Over the Christmas break, I pulled it out and started working on it.

Lathe Cleanup

Major lathe parts
The major lathe parts

The first step was to disassemble, clean and oil the lathe itself. Luckily, it came fairly clean and just needed a decent coat of oil. I purchased some light sewing machine oil from the local Joann’s and got to work. The tailstock, tool rest and lathe body are pretty straightforward to disassemble; just unscrew a few bits and off you go.

The headstock was more complicated.

Disassembled headstock

In order of operations:

  1. Remove Drawbar
  2. Remove oil hole covers on either end
  3. Unscrew adjustment nut
  4. Remove set screw on pully
  5. Remove left hand cone bearing
  6. Slide lathe spindle out

Once everything had been cleaned and oiled, I reassembled it and set it aside.

Setting up the motor

Along with the lathe, I purchased a small 1/12 h.p. Vigor motor with a pully attachment and variable speed foot pedal. This worked fairly well out of the box, but the foot pedal had some damage that caused it to stick when you let go. Additionally, the wiring was very old, cracked and showing the paper insulation inside. I decided to replace it with new wiring and a dimmer control instead of a foot pedal.

After a bit of cutting and soldering the new controller was in place. It consists of a dimmer light switch in the middle of a chopped up extension cord. This allows me to adjust the speed of the motor as needed and turn it off and on. While researching this, it was pointed out that a lot of AC motors don’t like variations in voltage and will heat up and potentially be damaged. These motors are instead controlled by varying the frequency of the power. Luckily, mine works just fine with varying voltage and I could tell this was the case going into it, since the original foot pedal does just that.

Motor and Dimmer
Motor and speed controller

For now, it’s screwed to a piece of plywood which is clamped to the bench. This is just to provide really simple adjustments to its position relative to the lathe. They are connected with a short length of fusible round transmission belt.

Misc Tools

After this, the only thing that was missing was a few collets, a couple of gravers and some raw stock to try out. This lathe conforms to the Webster & Whitcomb standard and Sherline products makes lathe collets for that type, so I purchased a starter set from them that came with 5 metric collets. The raw stock was picked up from Esslinger.

I decided, for the time being, not to buy special gravers. Instead, I came across an idea on a few forum posts about using concrete nails (which are hardened and tempered already). 7 bucks for a box of nails and some time at a bench grinder and arkansas stone and I now have a couple gravers to play with. To make things easier, I also ground off the heads and pressed them into a short length of wooden dowel to make a rudimentary handle.

Concrete nail gravers
The progression from raw nail to simple hand graver.

They seem to work ok, but I’ve noticed that the edge gets dull a lot quicker than I expected for a soft metal like brass. I’m not sure if I damaged the temper (I did try not to let it heat up, but perhaps I wasn’t as successful as I thought), so I may need to try making a new one and seeing if it works any better.

First Cuts…

Once everything was set up, I gave it a spin. The results are below. A couple of miniature belaying pins. The short one was done entirely free hand, the long one was an attempt at making one to specific measurements based off a real one on one of the ships I volunteer on in my free time. Not bad for a first try!

Miniature belaying pins in brass
I definitely need to work on the polish, but I am quite satisfied for a first try!